1. Home
  2. /
  3. JasminCam
  4. /
  5. Browser streaming freemium...

Browser streaming freemium features

Streaming with OBS

OBS (abbreviation for Open Broadcaster Software) is a free-to-use software for video recording and live streaming.

We decided to make it available for the freemium sites and categories so our valued partners could use it for streaming.


OBS can be downloaded from the following sources: https://obsproject.com/


Windows, macOS and Linux operating systems are all supported by the software.

Video tutorials

Overview

The guide for OBS is broken down into five segments, each detailing a setting panel in the software. Necessary information and a step-by-step guide how you should set up OBS in order to be able to stream on our sites.


1. Preview window and Scenes

The video feed which is visible in this field will be transmitted to the site. You need to check your stream for defects in OBS and handle any issues there.
Scenes function as a group of settings for different type of outputs. (For detailed explanation and examples, check the menu named: Preview window and Scenes).


2. Scenes 

Choose your previously set “Scenes” (set of settings) here.
(For detailed explanation and examples, check the menu named: Preview window and Scenes).


3. Sources

This panel allows to add different kind of sources that are then displayed in the Scene they are added to. (For detailed explanation and examples, check the expand named: Sources).


4. Audio Mixer

Streams will need audio too; this is where the Audio Mixer comes in. All available audio output devices are listed there and the ones that you want to use must be selected correctly. (For detailed explanation, check the expand named: Audio Mixer).


5. Settings

A wide range of settings that allow configuring technical aspects of the stream. If you would like to stream on our sites, you have a set of values that need to be properly adjusted. (For detailed explanation, check the expand named: Predefined Profiles).

Preview window and Scenes

Preview window


This is the part of the stream that shows what will be transmitted to the site. If there are multiple sources added (like in the example picture), it will appear in the same way on the site too. It is important to note, that the preview’s resolution can be adjusted separately so if this is set to a higher or lower resolution than the webcam, the stream might appear with borders around it or zoomed in. 


You might also notice, that there are two parts of the stream, one of the image and another one which shows the webcam’s feed in the bottom right corner. This is due to being able to set up several sources at once. The preview’s size can be adjusted by dragging the thin red border around the image you want to change.

Sources

Sources


This panel is the main tool for setting up streaming devices which will then be used by OBS to transmit. Since there are several options here which can naturally cause confusion, this guide focuses solely on the needed configuration for you to be able to stream on our sites.


Important to know: sources have a priority order so if there are multiple video sources selected, they will show on top of each other, according to their order in this panel.


The gear icon opens the settings of the source.


With the arrow icons you can re-order sources.


In order to set up streaming, you need to add the following sources:


  • Audio Input Capture

The audio gets selected automatically, but if you wish to use a different one from the built-in, you can do so by right-click & selecting Properties. The Device dropdown will show all available input devices.


  • Video Capture Device

Click on the “+” button to ad a new source, and choose your webcam device. Click okay or give it a unique name (optional), to arrive at the following setup window:

Settings that need to be applied here:

  • Resolution/FPS type: Custom
  • Resolution: 1280×720 or 1920×1080
  • FPS: 30
  • Video format: Any
  • Color space: 709
  • Color range: Full
  • Buffering: Disabled

Audio Mixer

You can choose which audio input device is active on this panel. The ones you do not wish to use can be muted by clicking on the speaker icon.


Check the Volume sliders to monitor your volume levels. Should they hit the yellow area, that means your volume is ideal, or just slightly above it. Should you see it hitting the red areas, that would probably mean your volume is extremely loud, and you are possibly having distortion in your audio. Lower the recording volume of your audio device when you experience this.

Predefined Profiles

To make it easier if you are not self-confident in doing the settings themselves, we have several configuration profiles which can be imported into OBS. These will automatically set the values to predefined values. 

Configuration720p1080p
Windows Intel QuickSync encoding
Windows hardware (AMD) encoding
Windows hardware (NVidia) encoding
macOS hardware encoding
macOS software encoding

How to apply the configuration files:

  1. Download the appropriate .zip file from the list above. (If you are in doubt please visit the “Technical” section our Support Chat)
  2. Unzip the folder to a location you know (for example: Documents). 
  3. Click on the Profile menu on the top in OBS.
  4. Click on Import.
  5. Select the folder you have unzipped (not a file in there, the entire folder).
  6. Make sure that the imported profile is selected.

How to Go Online with OBS

By clicking on the Go Online Now widget in Model Center (See below), you are prompted with a window where you need to select the method you’d like to use for streaming.


1. Stream with a browser
Using this method, you will go online with the regular browser version.

2. Stream with a third-party app
Using this method, you will receive an information dialog window. This should take only a few moments and ends in showing Server and Stream Key information panel.
Should you face any error message here, feel free to visit us on the Support Chat

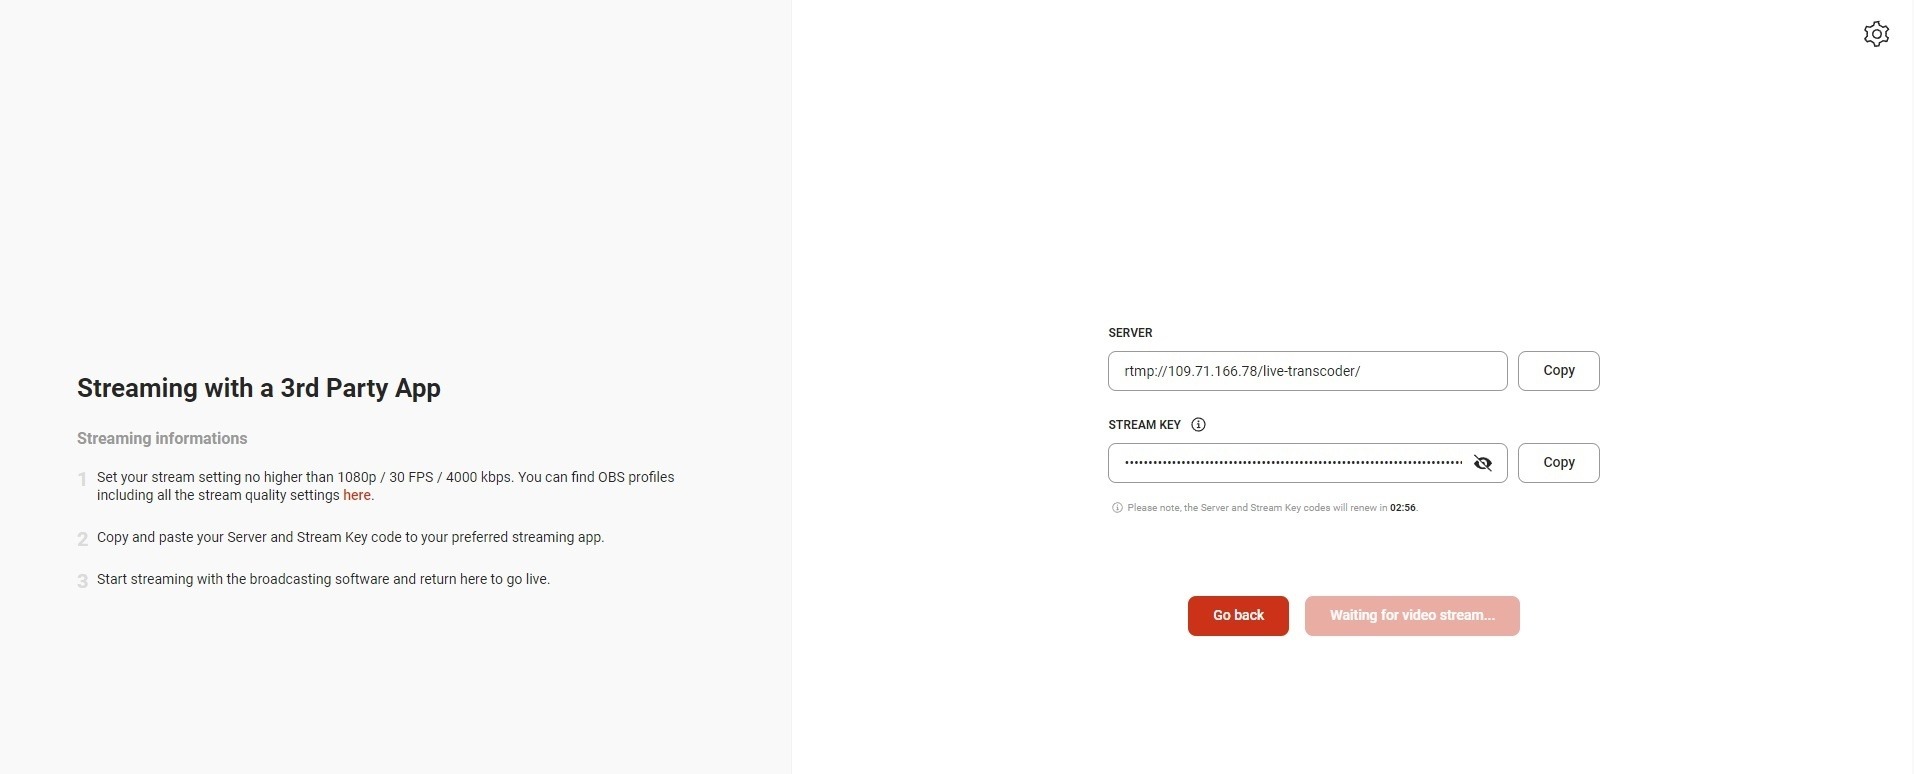
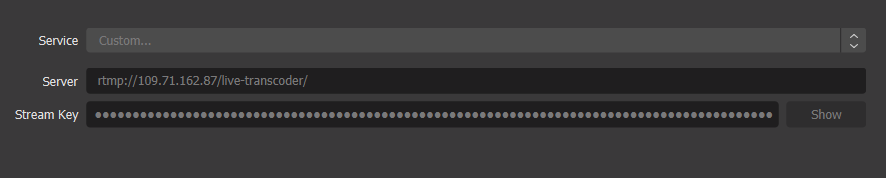
  1. Make sure your stream settings are not higher than 1080p/30fps/4000kbps.
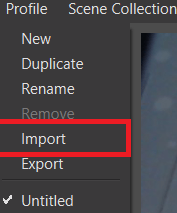
    These are settings that needs to be set in OBS and are included in the Predefined Profiles you can download from this guide.
  2. Copy and paste your Server and Stream key code to your preferred streaming app. (Preferred streaming app refers to OBS in our case).
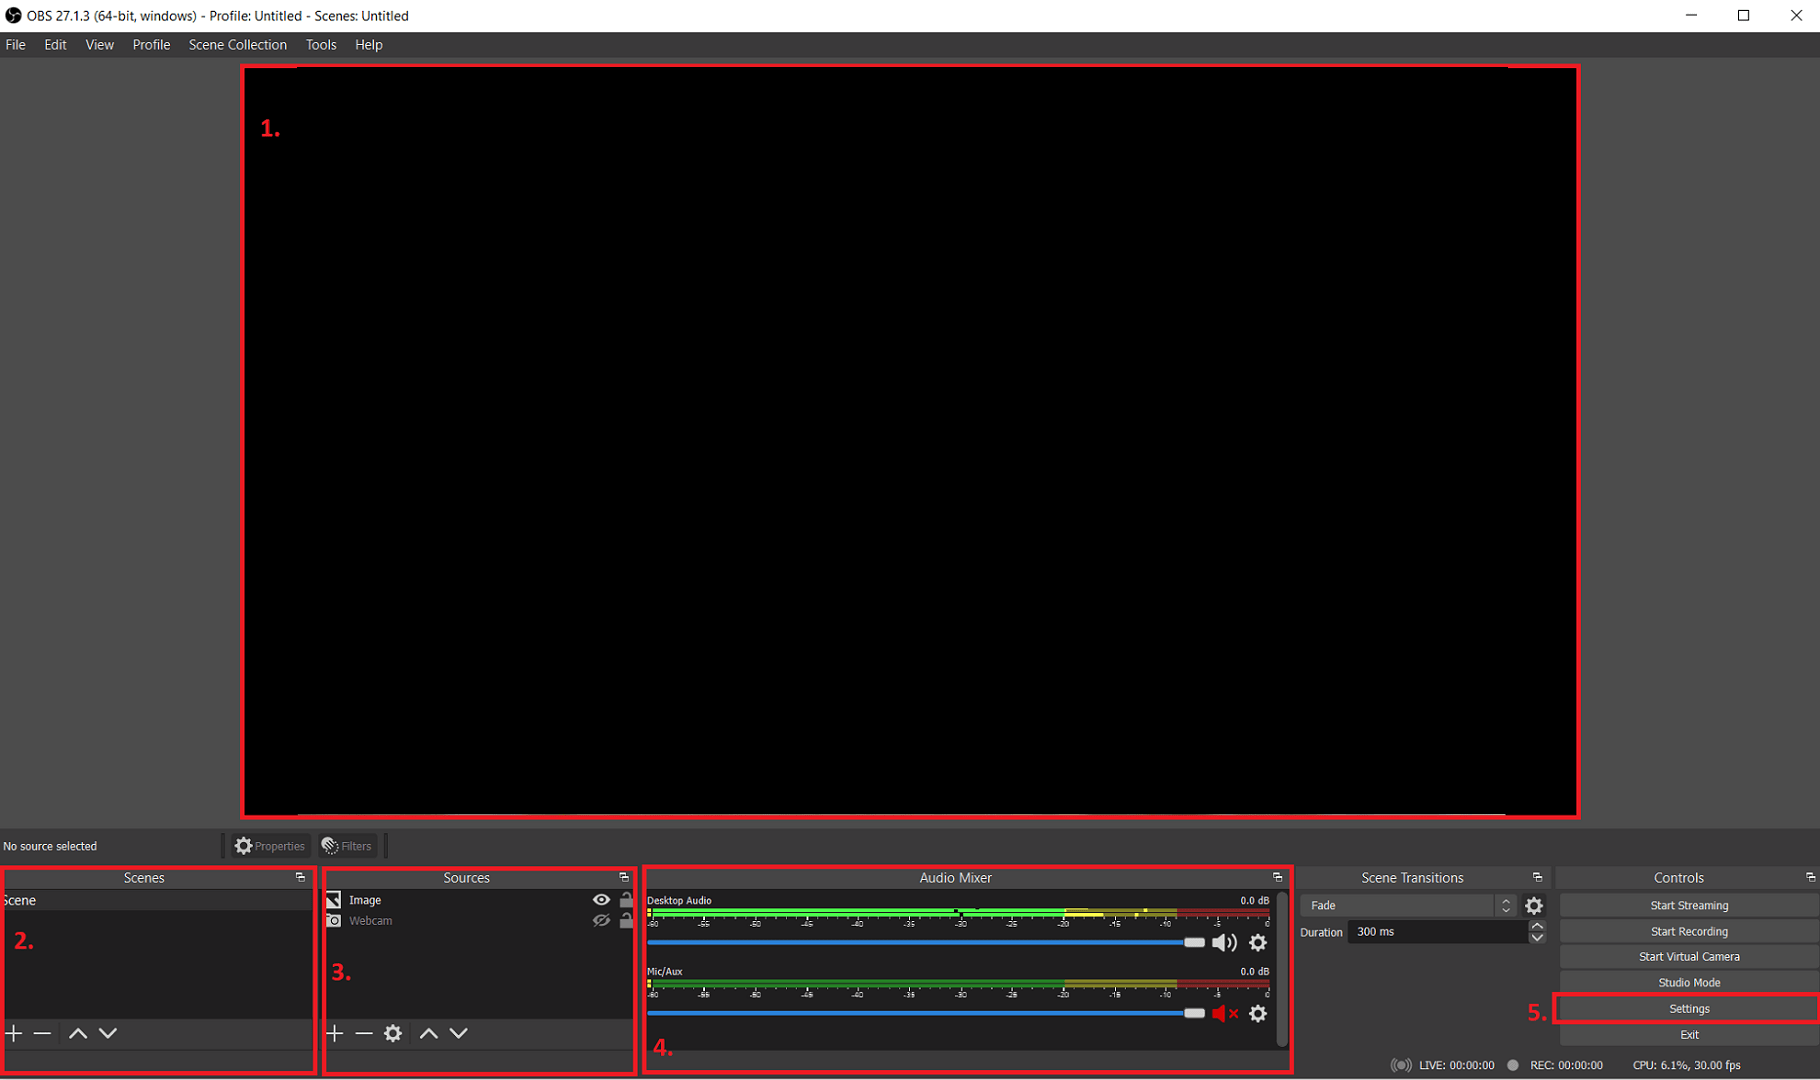
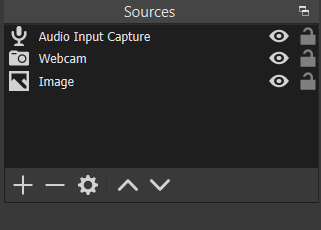
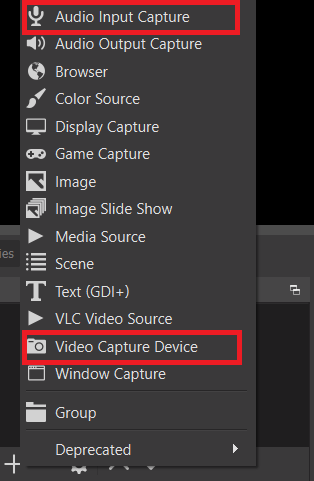
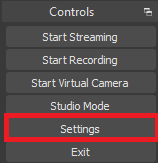
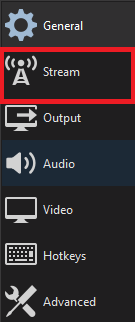
    Server and stream key data needs to be added to OBS. You can do this by clicking on the Copy button for each of the text fields.

    a. To add these entries you will have to open the appropriate section from the Settings. First of all, please locate the “Settings” from the bottom-right corner in OBS. (See below)


    b. After that, the Settings panel will pop-up., Here please select the “Stream” tab from the left menu-bar.
    c. This will open the window where you need to add the entries you have received and copied from Model Center Streaming Information window. When done, click on “Apply” in the bottom-right corner of the Settings window and then click on “OK” to close the Settings window.
    d. When both the Server and Stream Key have been pasted and applied, you will need to click on the “Start Streaming” button in the bottom-right corner.
    d. When all the above steps were done, switch back to the Model Center Streaming Information window. The “Go Live” button should appear instead of “Waiting for video stream” (3. picture). Click on it when you are ready to go Online.

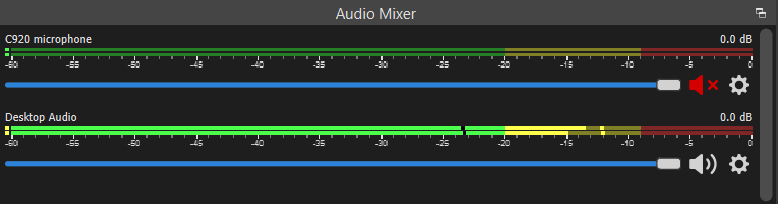
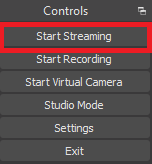
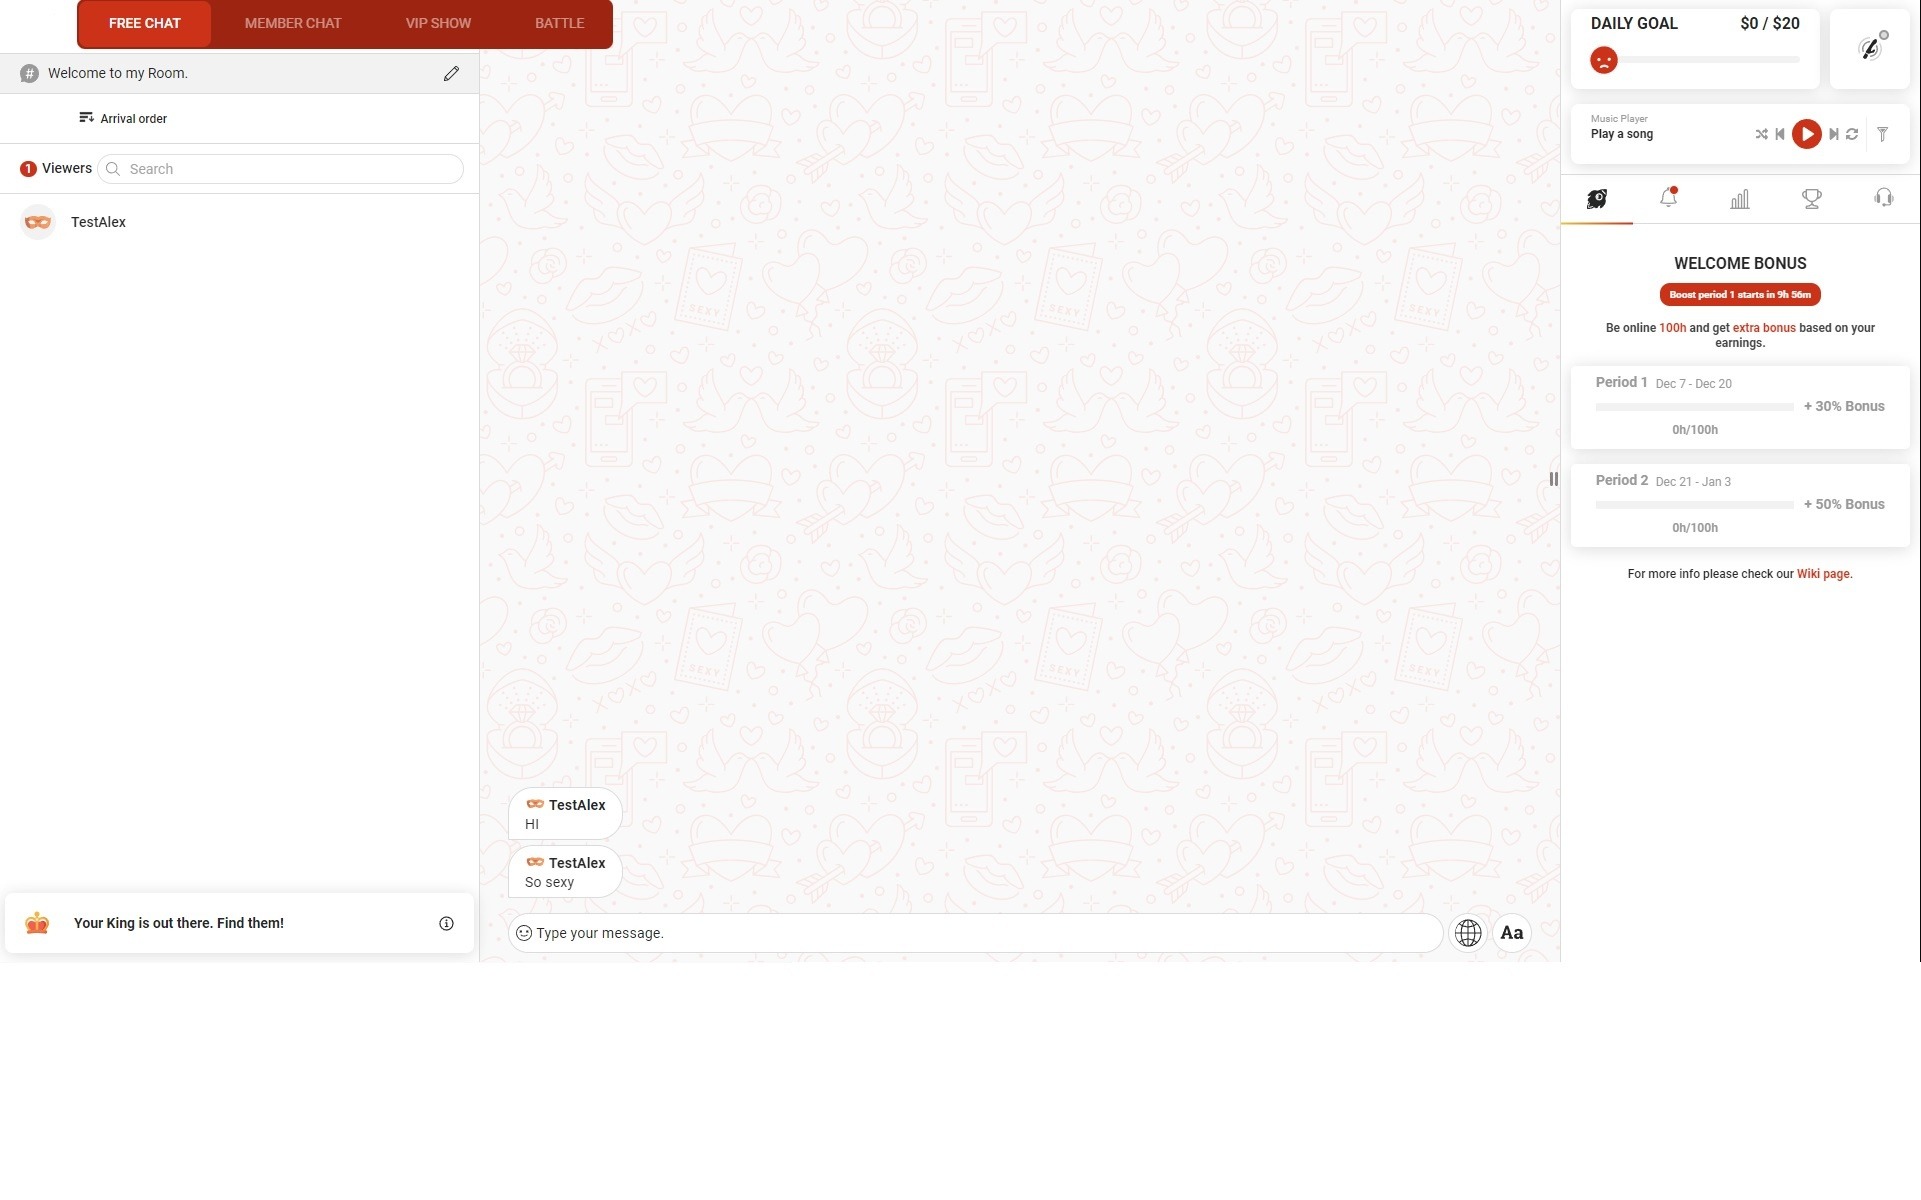
  3. When you are finally Online, the regular LiveJasmin layout will welcome you (Picture below), with one small difference to the usual – No preview window will appear on the right side. The preview window will remain in OBS, which you can use to monitor your own video feed, along with the Audio-mixer where you can check your volume levels.

How to connect toys via Lovense connect

Setup steps

3a) 

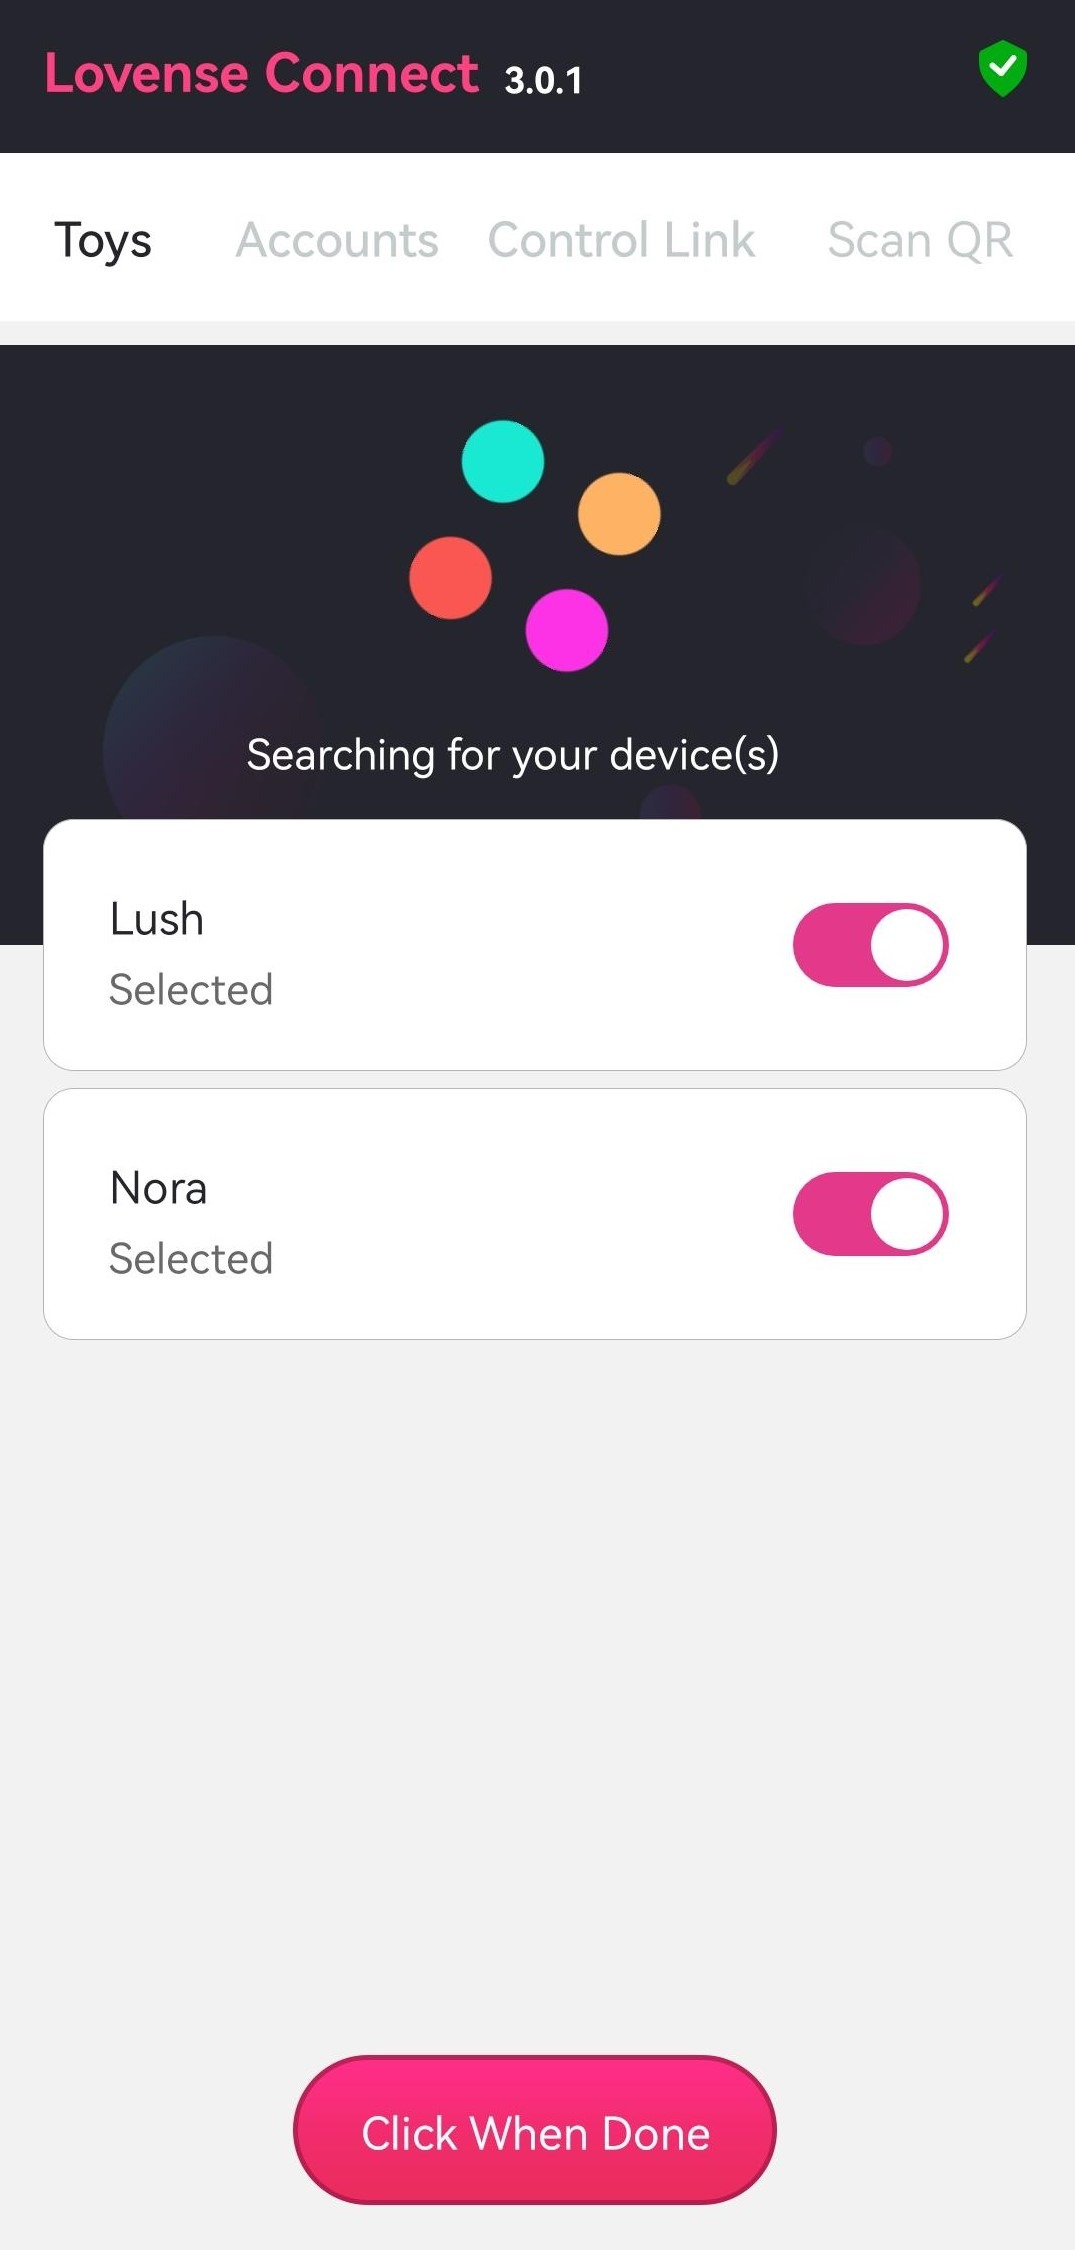
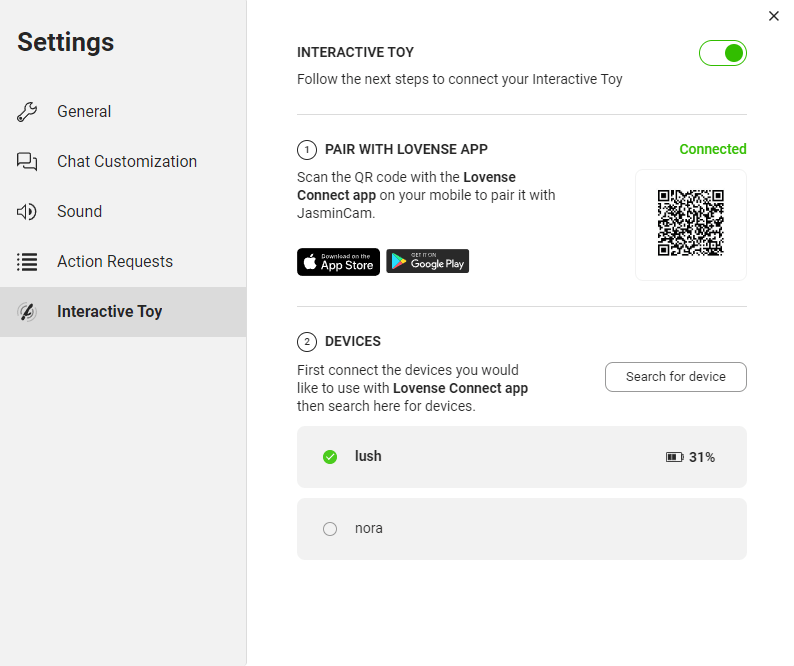
Press and hold the button on the toy for 3 seconds. When the red light starts flashing, it means that it’s searching for pairing.
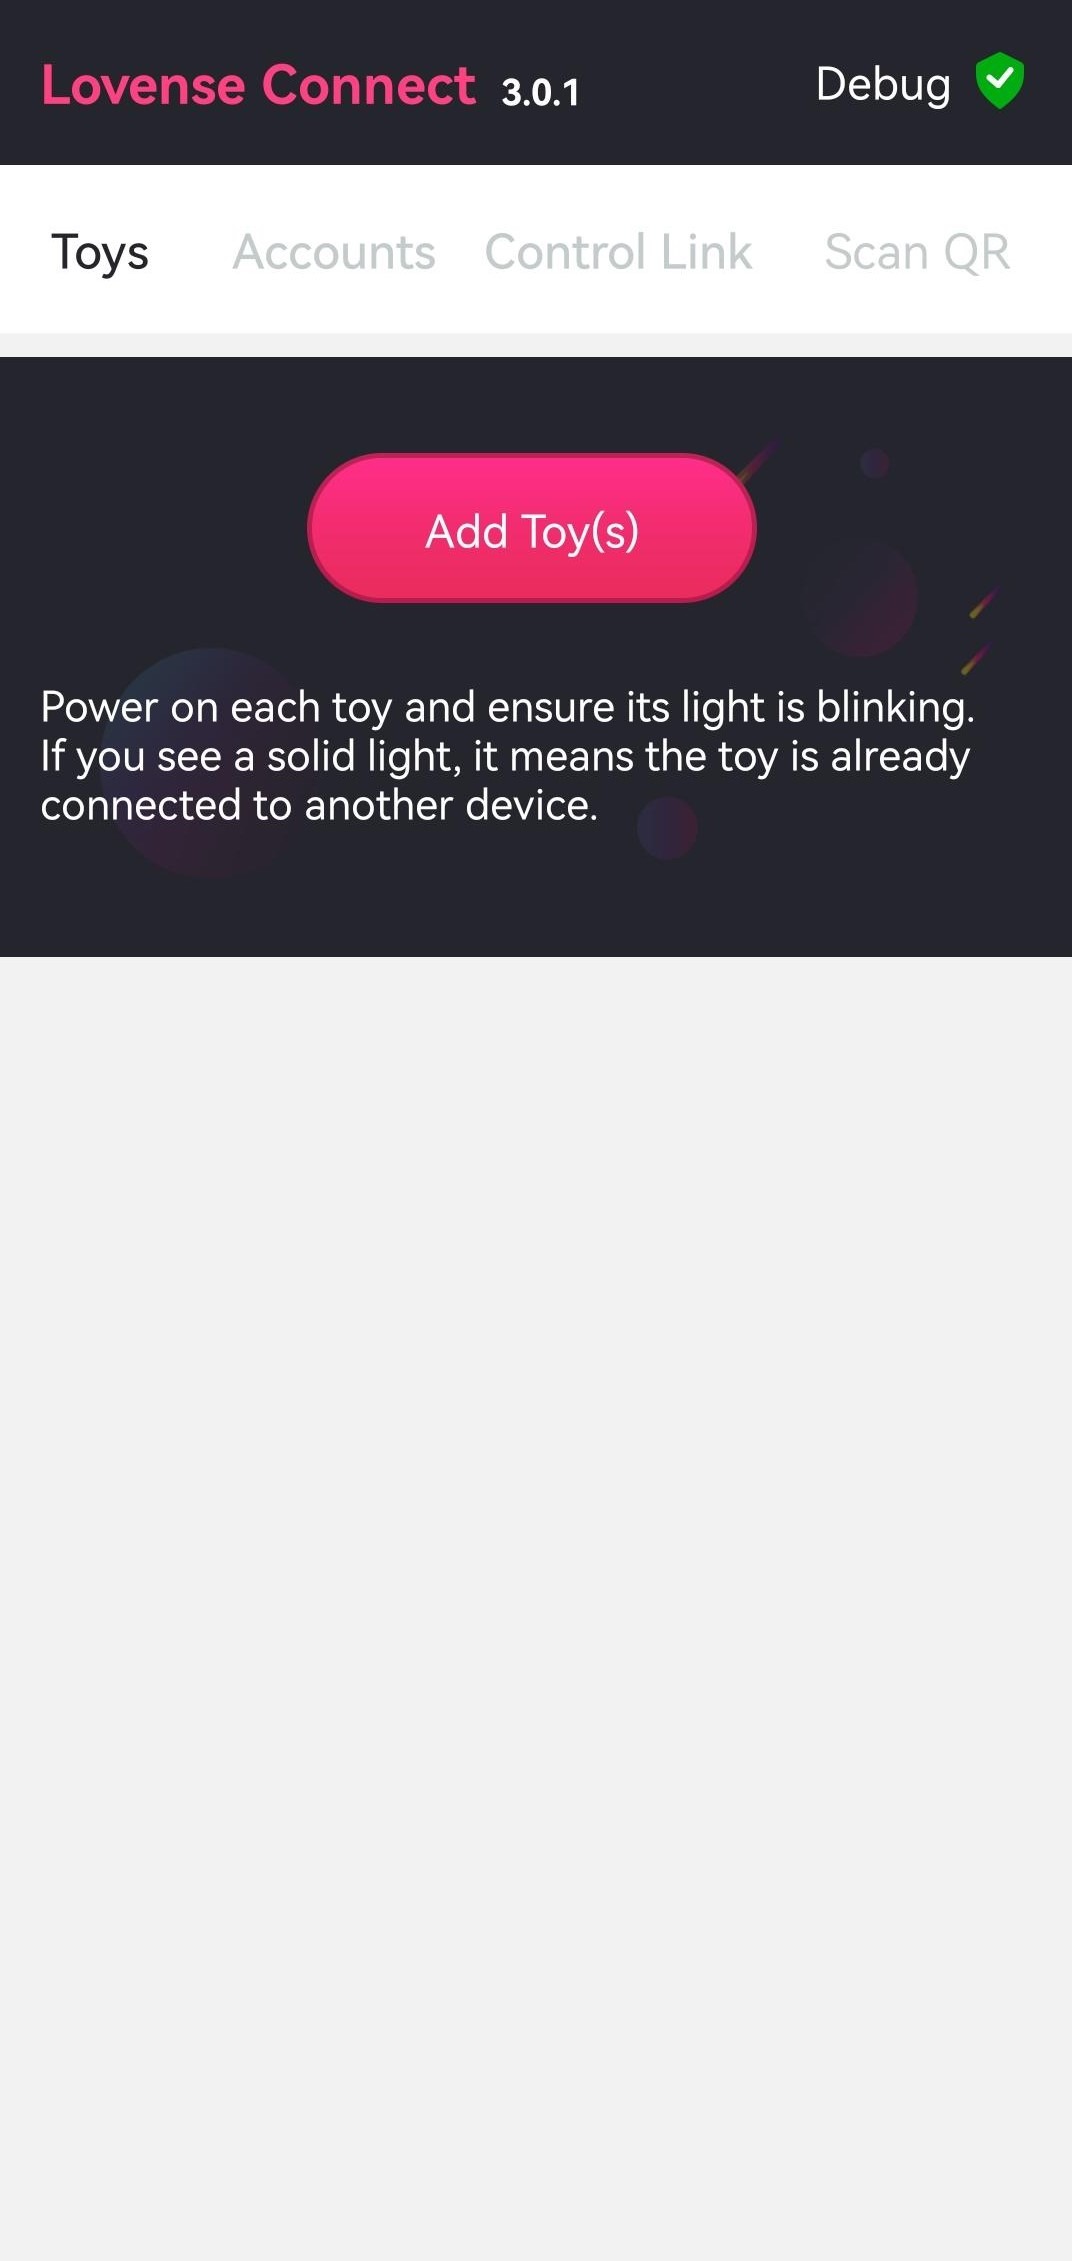
3b)
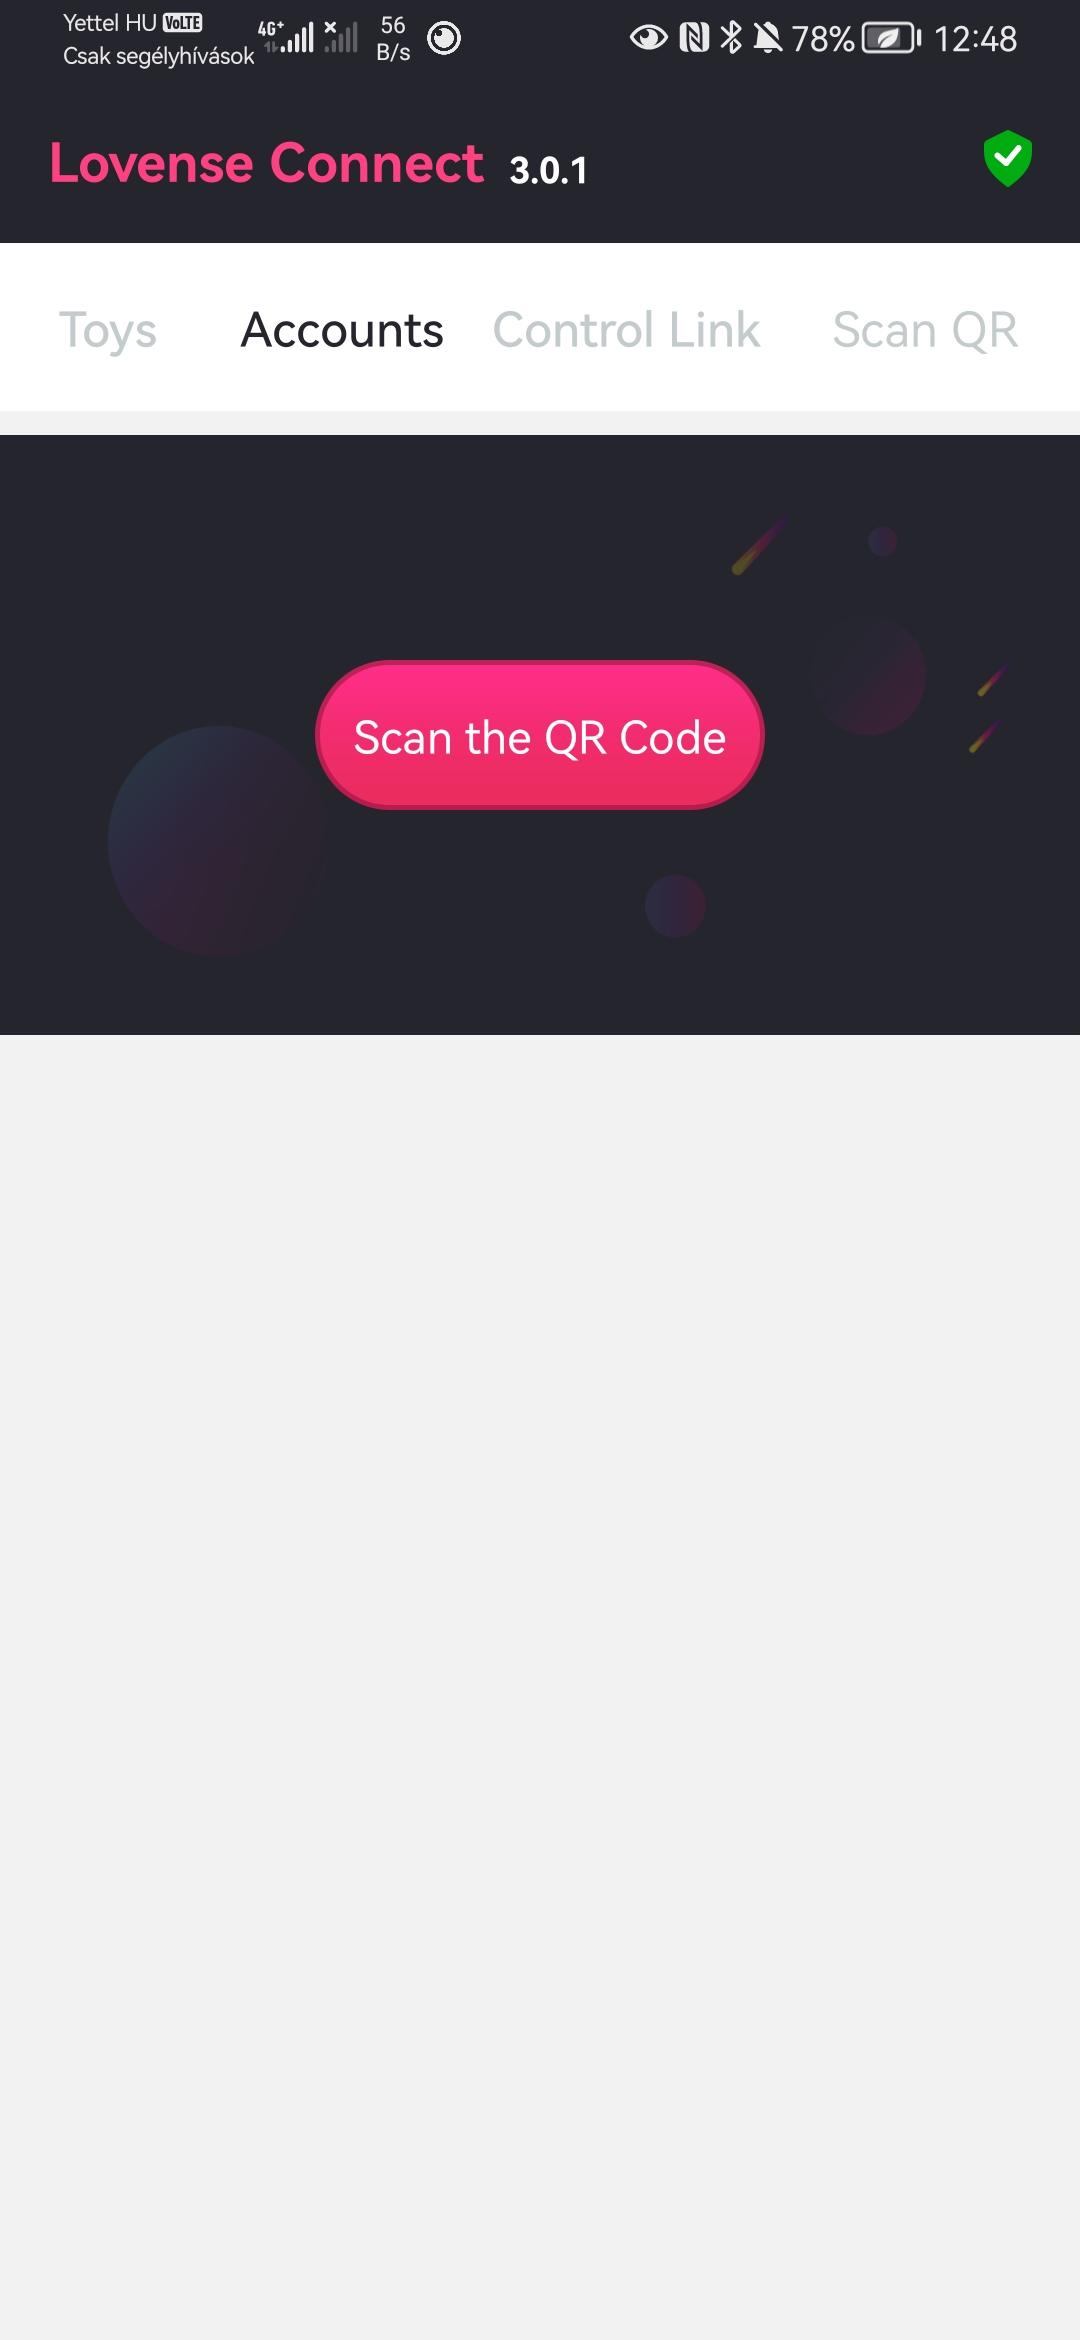
Tap “Add toys” in the Lovense connect app 

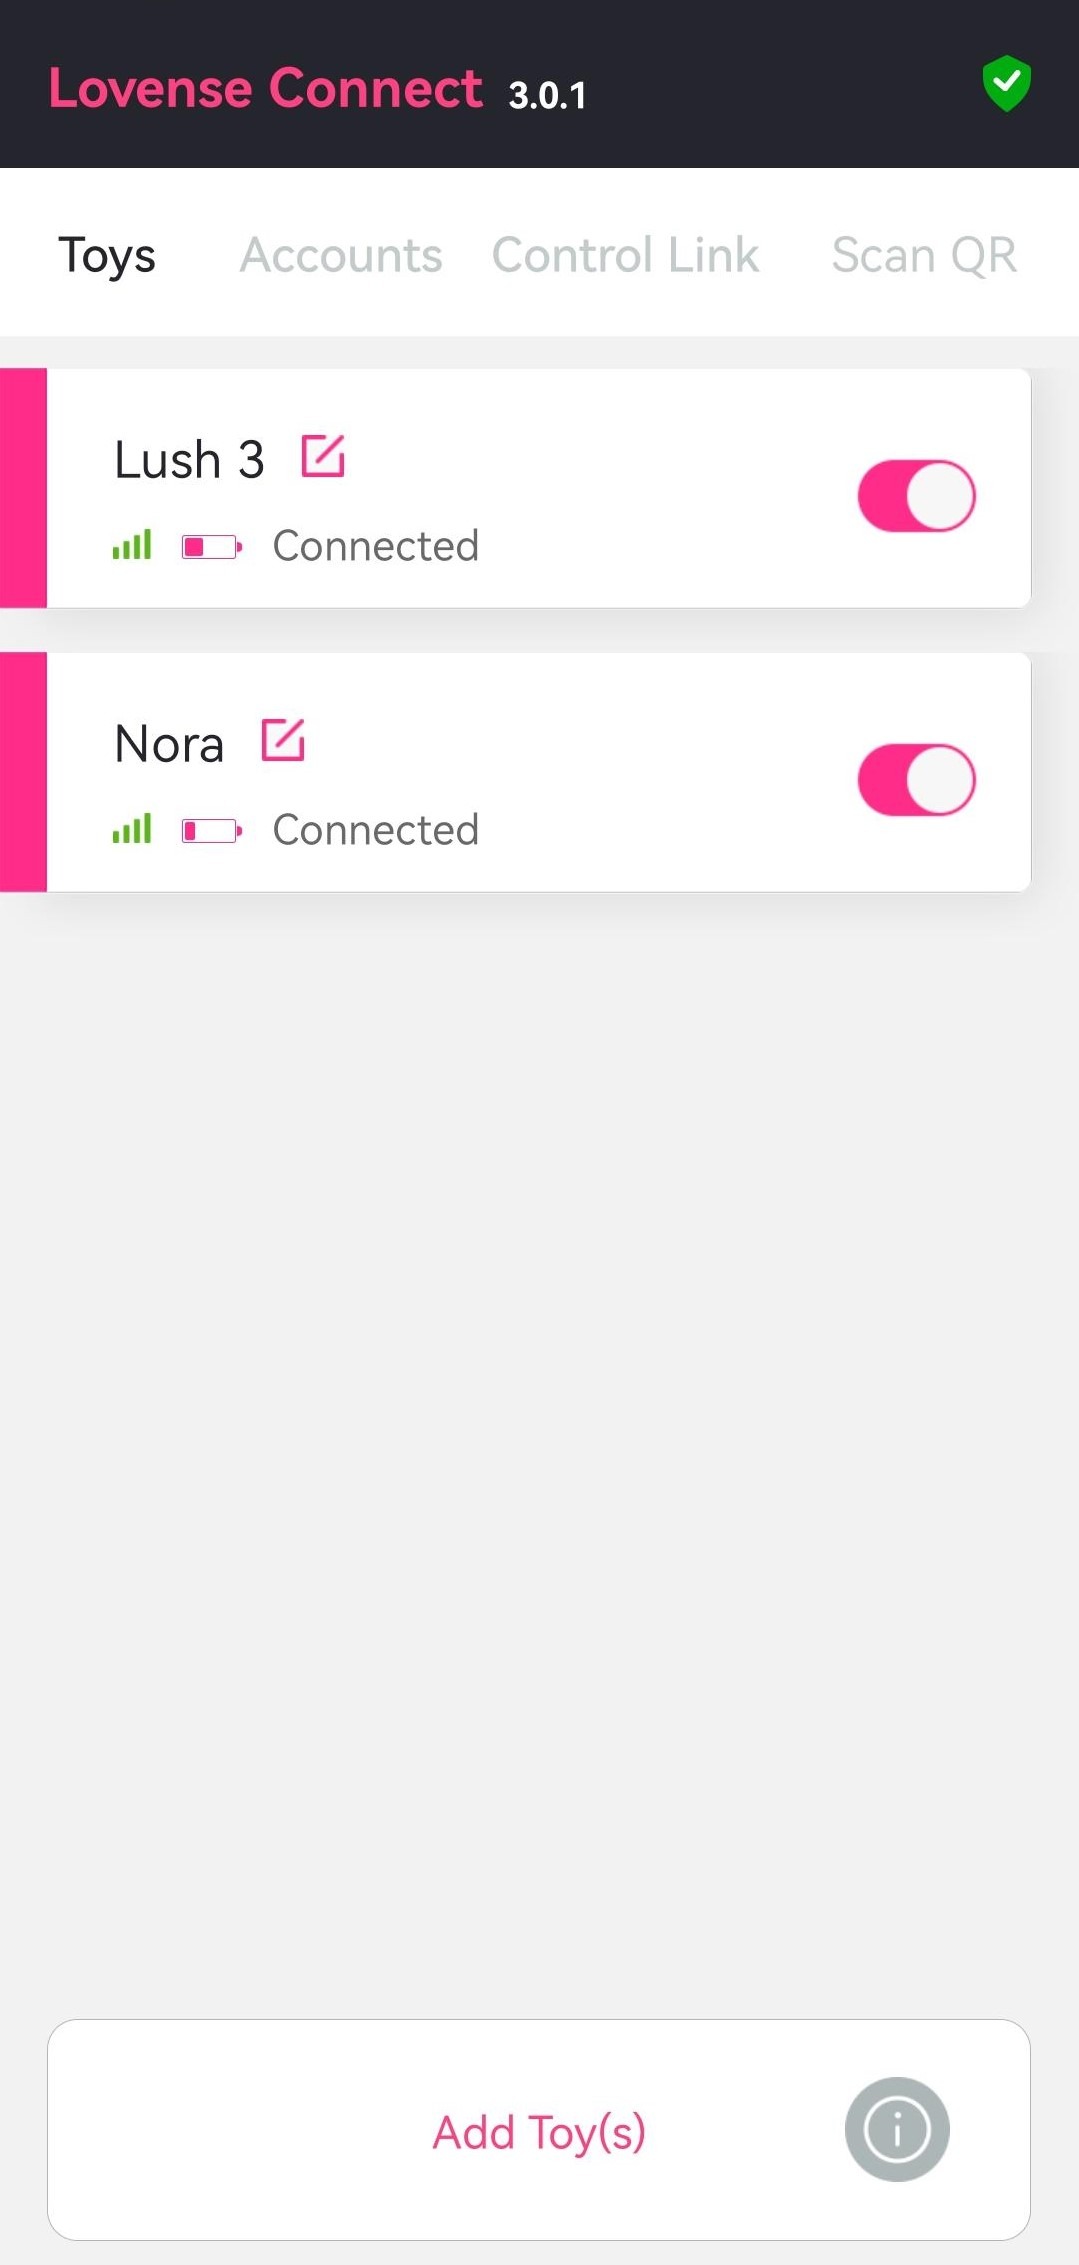
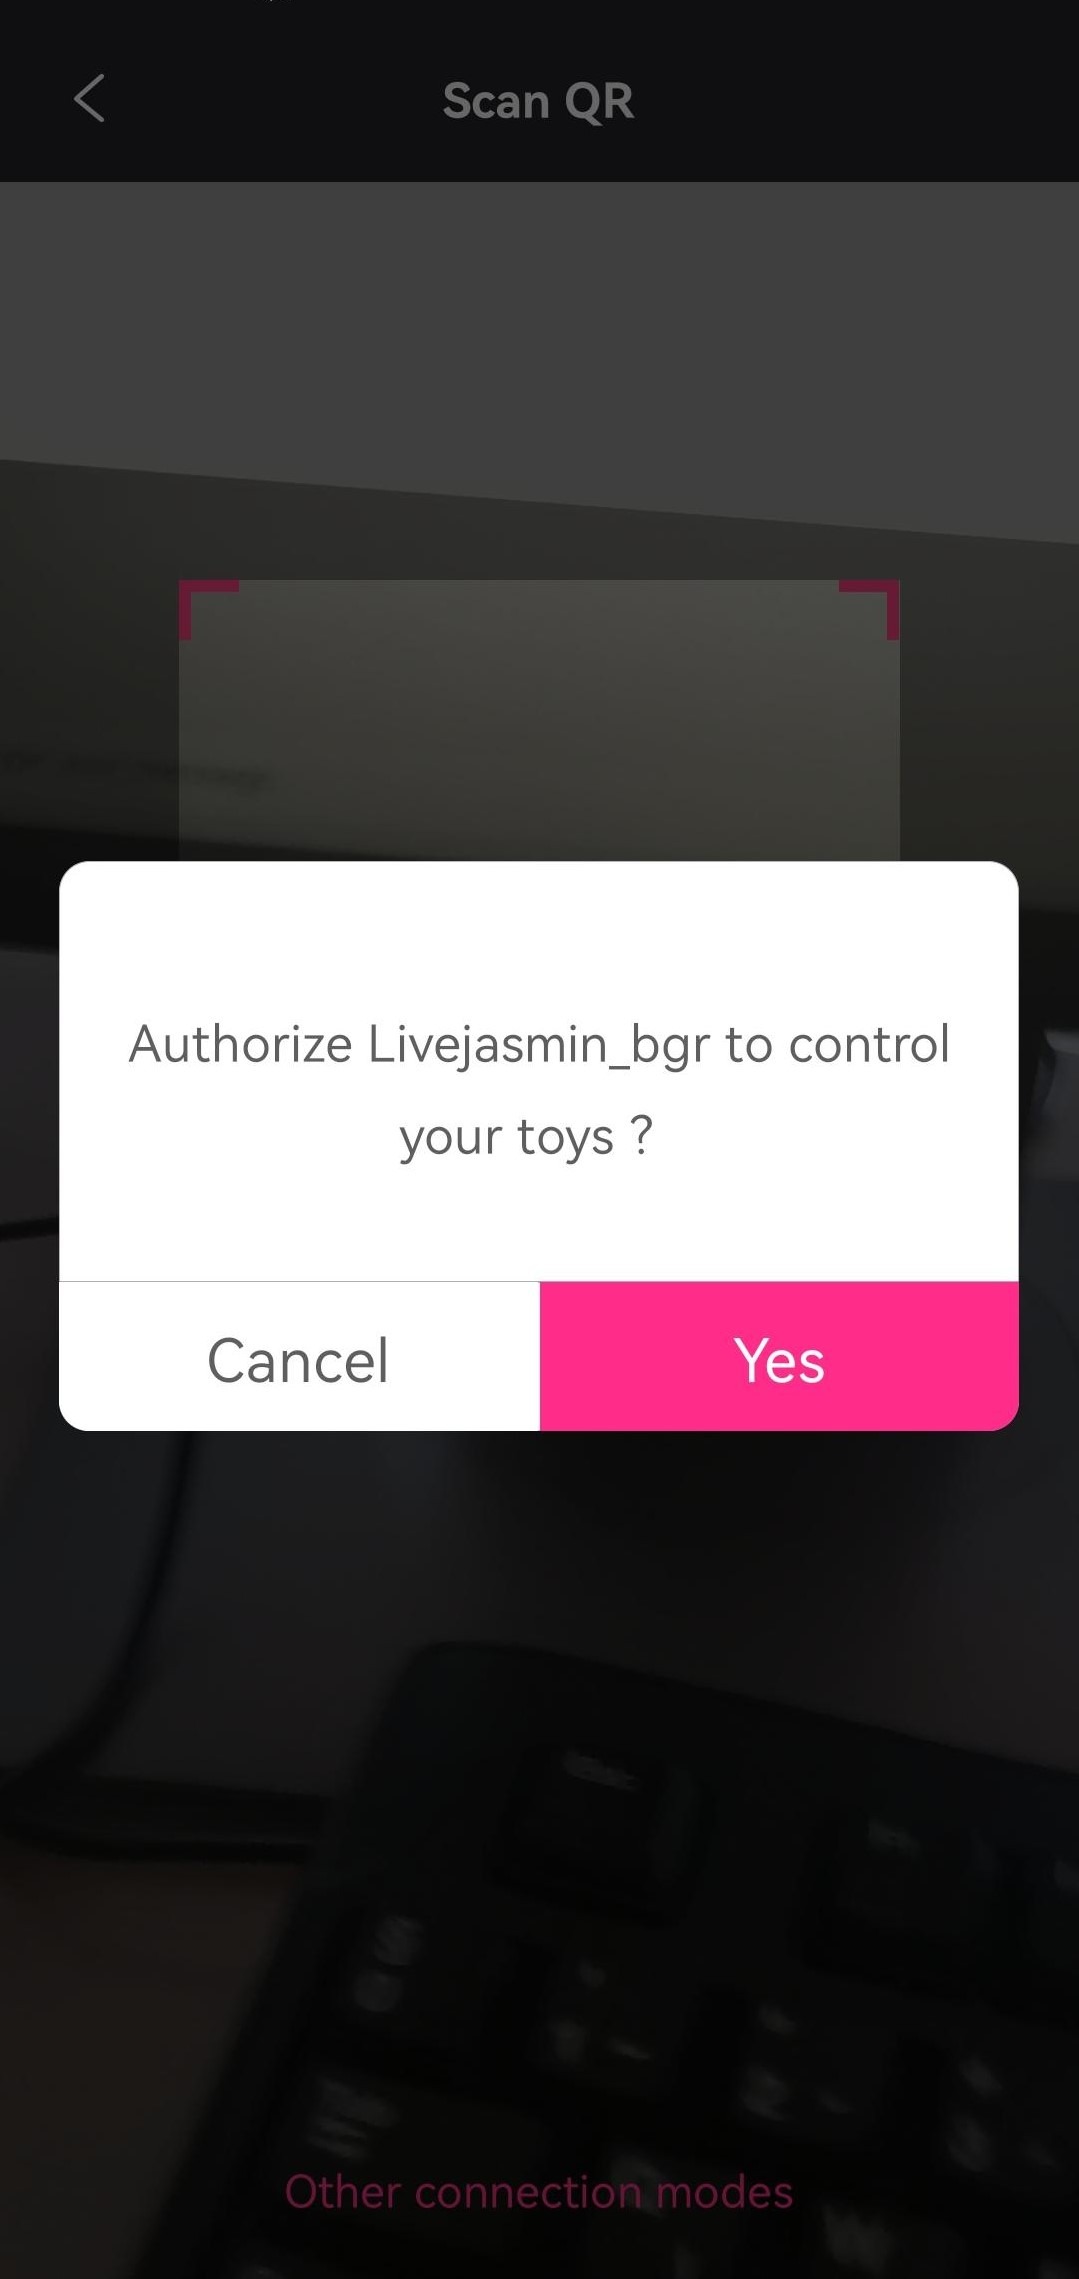
3c) The application will search for the toy, once it is found tap “Click when done” 


Table of Contents

Related topics

Speech-to-Text

Easier communication We’ve added a handy new tool to…

Windows Guide

Installing JasminCam on Windows Click on the yellow ‘Download…

Mac Guide

Installing JasminCam on Mac JasminCam standalone version is available…
Can’t find what you’re looking for? Contact LiveJasmin Support

YOU MUST BE OVER 18 TO ENTER THE SITE

Privacy Preference Center

We process user’s data to deliver content or advertisements and measure the delivery of such content or advertisements, extract insights and generate reports to understand service usage; and/or accessing or storing information on devices for that purpose. Below you may read further about the purposes for which we process data, exercise your preferences for processing, and/or see our partners. Cookie Policy.

Manage Cookie Preferences

These are cookies that are required for the operation of our website. We use, for example, these cookies to enable the purchase functionality on our website or to route traffic to the right servers on our network.

These cookies allow the website to remember choices you make or your preferences (such as your language or the region you are in) and provide enhanced, more personal features.

We use these cookies to gain insight into how you use our site. This helps us to understand how interact with our site, what is interesting for you and how we can improve our services, and enhance the overall user experience.

We use cookies to personalize the content specifically for you, by displaying models who may be of interest to you, based on your previous activity. Data relating to your previous activity might reflect your sexual preferences.

LiveJasmin Model & Studio Wiki contains adult content.
By using the website you acknowledge that you are over 18.